Cash Received Report (CRR) Entry
Quick Reference Guide
Navigation
1) Open Web Browser and access UM Web Applications: https://webapps.umsystem.edu/
2) Click the Web Applications button and log in using your UserID and password.
3) Click the PS CRR/ARR link on the menu page. This will take you to the Cash Received Reports home page.
Procedure
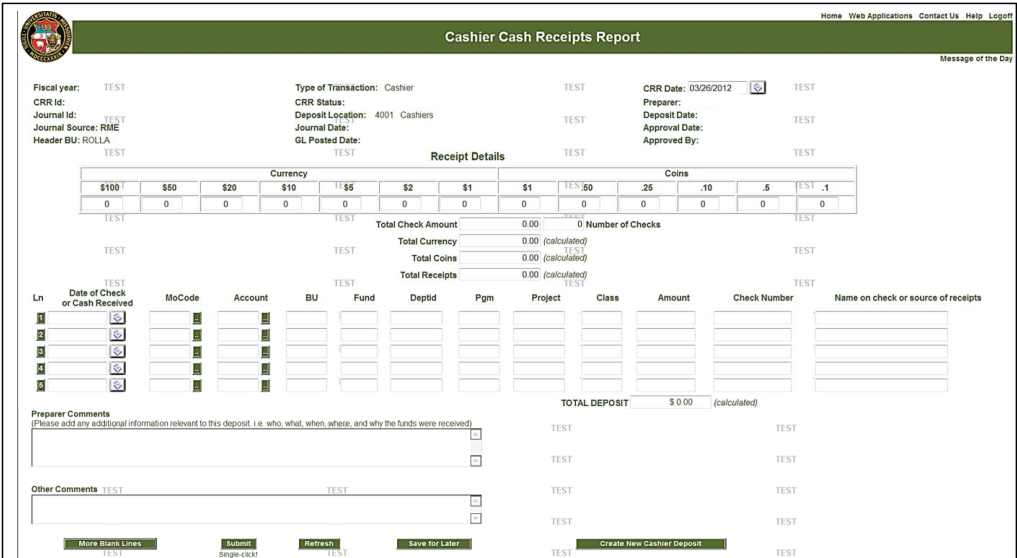
1) On the Cash Receipts Report home page, click the CRR Cashier Deposit button. 
2) CRR Date defaults to the current date. Enter or select another date, if applicable.
3) Cash deposit: Coins and Currency: enter the number of coins, number of bills by denomination in these fields.
4) Check deposit: Number of Checks & Total Check Amount: Enter the total amount of the checks and total number checks in these fields.
5) Enter deposit line details: Use separate lines as ended, to distribute the deposit across multiple unique chartfield string combinations (MoCode & Account)
- Date of Check or Cash Receiced: Etner or select the date.
- Enter chartfield values for the deposit by either using the MoCode & Accont - OR - by manually entering the entire chartfield string (Account, BU, Fund, Deptid, Prgm, Project, Class)
- Amount: Enter the amount deposited into each chartfield string on the appropriate line.
- Check Number: Enter the check number, if applicable
- Name on check or source of receipts: Enter appropriate information..
6) Prepareer Comments: Enter additional information relevant to the deposit.
7) A CRR number will be issued once the CRR has been saved and/or submitted successfully:
- Save for Later: If you are not ready to submit the deposit and want to finish later.
- Submit: When the deposit information is complete.
8) Supporting documents can be attached to the CRR once it has been either saved for later or submitted: Click the Supporting Docs button to browse for documents in your files, locate the document(s) and double click on those you want to attach.